The end of a yoga class probably is what people will remember most. It’s a perfect moment to cool down and finally tune into the body and feel the benefits of the yoga practice settling in. At the same time, you want to allow some time for the transition from the safety of the yoga mat to the challenges and fast pace of everyday life.
“Even after you’ve rolled up your yoga mat, yoga continues.”
Let’s look at four different ways to end a yoga class:
1. End Your Yoga Class With Restorative Yoga Poses
The majority of yoga classes are quite active classes aimed at building heat and increasing strength and flexibility by moving through a variety of different poses. However, when the body is moving at full-speed, the mind is running as well. To calm body and mind down, it’s a good idea to end a yoga class with some slower paced movements.
Restorative yoga poses are perfect poses to practice before Savasana since they help to find physical and mental balance and can thereby reduce stress and anxiety. The use of props such as bolsters, blocks, and blankets allows practitioners to hold the poses for a longer period of time, thus providing all the benefits of deep and passive stretching.

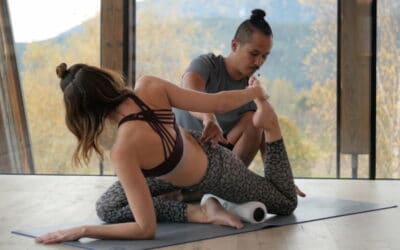
Kat Fowler doing a restorative yoga pose on TINT.
Due to the long holds, the muscles can relax deeply, which is a good way to counteract the more active part of the yoga practice and a perfect antidote to stress. Restorative yoga poses are all about slowing down and opening the body
A restorative yoga sequence at the end of a yoga class does not have to include more than five or six yoga poses to practice before Savasana. Restorative yoga poses include gentle twists, forward folds, and back bends, which are mainly practiced seated.
If you’re looking for inspiration for a restorative yoga cool-down sequence, check out, for example, Alex Harfield‘s Flow & Release or Matt Giordano‘s Surrender practice on TINT. David Lurey and Mirjam Wagner created a soothing Final Yin to seal the yoga practice. Or maybe you want to give Duncan Wong‘s Lotus Hip Therapy a try?
To get more inspiration not only for a yoga cool down, but also for a yoga warm-up and more free sample yoga class plans, check out our free eBook that contains a collection of different yoga class plans for different levels. The eBook provides pictures of the relevant asanas in a logical order and along with the most important alignment cues. You’ll not only find a ready-made sequence for your yoga cool down, but also whole class plans for yoga in the morning, in the evening, or yoga for beginners.
2. End Your Yoga Class With Pranayama
Already the ancient yoga traditions suggest to practice pranayama after asana (the physical yoga exercises). The logic behind this suggestion is that you should begin with the gross and progress toward the more subtle.
However, this doesn’t mean that it’s necessary to be perfect in asana practice before practicing pranayama. It simply means that, when these methods are combined, asanas should come first.

Include breathing exercises into your yoga cool down. Photograph by Fabian Møller on Unsplash.
Slow and deep breathing exercises are down-regulating practices. That’s why they’re great to help your students de-stress and unwind at the end of the yoga class. They help to calm down the sympathetic nervous system, while at the same time slowing the heart rate down. This allows your students to feel safe and relaxed and can thus reduce stress hormone levels in their bodies.
Apart from that, yogic breathing exercises can help to focus the mind and are therefore a great preparation for a possible meditation practice at the end of the yoga class.
The good news is that it doesn’t always have to be a very advanced and complicated pranayama. You can, for example, start by introducing breath retention, called Kumbhaka, to your students. This will help them focus their minds. There are two possibilities: Either hold the breath after the inhalation, or retain it after exhaling.
Other great breathing exercises to practice before Savasanainclude Nadi Shodhana (Alternate Nostril Breathing) due to its calming and stress-relieving effects, as well as Bhastrika or Kapalbhati, which – in addition to their calming effect – also help to remove toxins from the body.
3. End Your Yoga Class With Meditation
Meditation practice is one of the best ways to find peace and to quieten the busy mind. The physical yoga practice can provide freedom in the body that makes the seated meditation practice more accessible and more comfortable. That’s why it’s a great idea to reap the benefits of the yoga practice immediately afterwards and end the yoga class with a meditation practice.
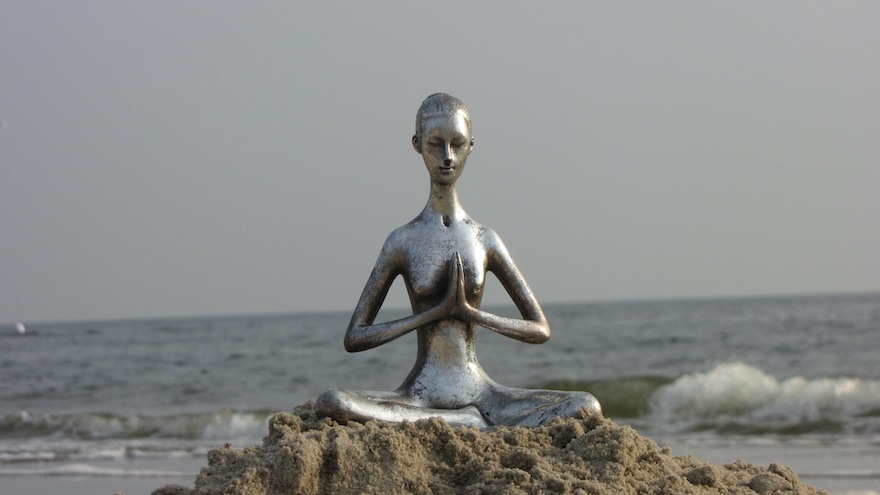
End the yoga class with meditation. Photograph by dolvita108 on Canva.
Begin in a comfortable seat on a block, blanket or bolster. Elevating the sitting bones above the knees helps to establish the natural curve of the spine. Remind your students to roll the shoulder blades back and sit up tall. Allow the eyes to close and the attention to shift onto the breathing.
Encourage your students to lengthen every inhale and to lengthen every exhale, keeping the breath even. Let them visualize how every inhale brings in clear white light into the body and every exhale removes any dark and negative energy from the body.
Guide your students through the visualization of their breath, drawing a more and more vivid picture of their breath. Refer to Kat Fowler’s Light Bath Meditation for more inspiration.
To get a better feeling and more ideas on how to effectively combine yoga and meditation, have a look at Matt Giordano’s 30-Day Yoga & Meditation Challenge or try Chris Su‘s The Power of Deep & Mindful Relaxation on TINT.
Experience the combination of yoga and meditation with Matt Giordano on TINT.
If you need more inspiration for your own yoga practice or your yoga teaching, check out our collection of free Yoga Class Plans, which provides different sample yoga classes for a variety of different needs and levels. Each class is described by way of pictures of the relevant poses along with the most important cues. You can download it for free and use it if you want to save some time preparing your yoga class.
4. Combine All Into A Yoga Cool-Down Sequence
You liked all of the ideas above but cannot decide how to put them into a well-rounded sequence? You can use the 10-minute yoga cool-down sequence below from Kristin McGee’s Restorative Flow on TINT. This sequence provides you a little bit of everything: pranayama, meditation time to tune into the body, and restorative yoga poses.
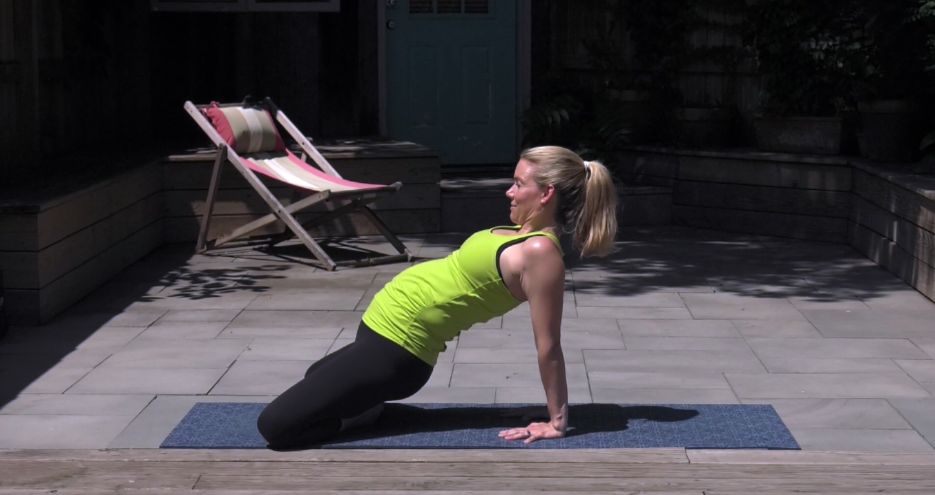
1. Connect With Your Breath
Start in a comfortable seated position. Close your eyes and rest your hands on your knees. Feel the elbows slide back in space so that the collarbones can expand. Create some space between the back bottom ribs and the hips, i.e. where the kidneys are.

Tune into your body at the end of your yoga class as in Kristin McGee’s Restorative Flow.
Engage the pelvic floor muscles and find a nice lift from the base of the spine. Lengthen the back of the neck toward the sky and just take a few breaths here to tune into your body. Then, gently open the eyes.
This is a great time for a breathing exercise (pranayama) called Nadi Shodhana or Alternate Nostril Breathing. It helps you to reduce stress and anxiety and calms the nervous system.
For this exercise, bring the first two fingers of the right hand to the palm. Use the thumb on your right nostril and the ring finger on your left nostril. Close the eyes and close the right nostril to inhale through the left. Close both nostrils and retain your breath for a moment. Then, open the right nostril to exhale. Try to keep contact with the fingers on the nose and to keep your elbow high and the shoulder down.
Now, inhale through the right nostril, retain, and exhale through the left nostril. Start all over with inhaling through the left again, closing both nostrils, and exhaling through the right. Continue for a few rounds, alternating between the right and left nostril.

End your yoga class with Alternate Nostril Breathing.
At the end of this pranayama, you can lie down onto your back and take a brief Savasana.
If you’re looking for more guidance on your yoga practice, we’ve created something special for you: a free eBook that contains yoga class plans ready to use for your classes. The eBook offers different classes for different levels, where you can find the asanas along with their descriptions in a logical order. You can either use the classes for your own yoga practice or your teaching.
2. Free Your Hips
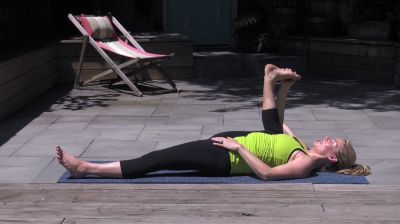
In a supine position, pull the right knee toward the chest and squeeze the thigh toward the belly for a gentle stretch in the thigh.
After a few breaths, bring some movement into your hip joint by circling the leg around in the hip socket. Move the bent leg from side to side by dropping it from one hand to the other. Let the leg get really loose to open up through the hip.
After a few movements, let it stay open to the right side and start to draw the knee closer toward the shoulder.
Bring the leg back to center, interlace the fingers behind the thigh and draw circles with the lower leg.
Flex the foot and extend the leg and then point the toes and release the leg. Alternate between those two movements a few times.

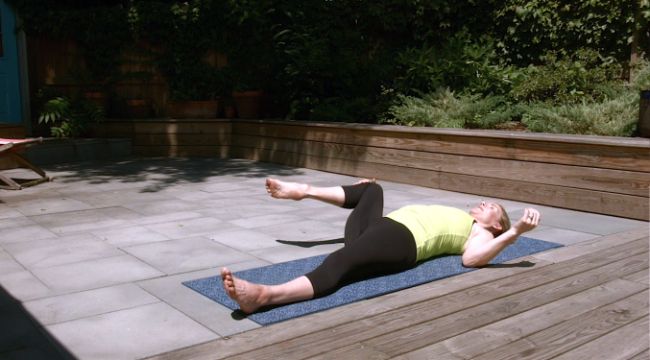
Stretch the thigh and bring some movement into your hips.
Extend the leg again and draw it closer toward the forehead. Take hold of the thigh, calf or maybe even the foot or big toe. However, avoid pulling at the knee joint. Another option here is to use a strap around the ankle and to gently draw the leg closer toward the body. Stay in this pose for a few breaths, but be gentle with the hamstrings. It’s not important how far the leg can come in toward the body.
Open the right leg out to the right side and turn your head to look at the opposite side. If available, start to draw the leg higher toward the shoulder but keep both hips anchored to the ground.
After a few breaths, bring the leg back to center and start to move it across the body to the left side, keeping the hip anchored to the ground. Turn the head to face the right side side and then move the leg all the way down on the left side for a deep IT-band stretch.
Come back to center and release the leg. Notice whether the right leg feels any longer than the left leg now. Repeat the same sequence with the left leg.
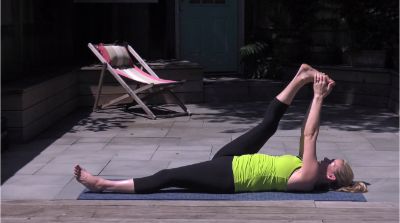


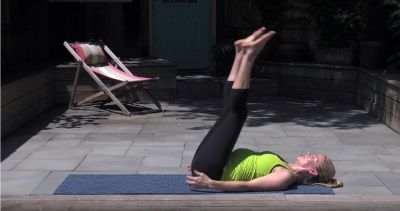
Straighten the legs for a nice hamstring and IT-band stretch.
3. Happy Baby
Pull the right knee toward the chest and take hold of the sole of the foot from the outside. Try to get the knee closer into the armpit. Stay for a few breaths and change to the other side.
Then bring both knees in for Happy Baby pose (Ananda Balasana). Rock gently from side to side on the sacrum.
After a few breaths in Happy Baby pose, open the legs into a supine straddle and stay for a few breaths.
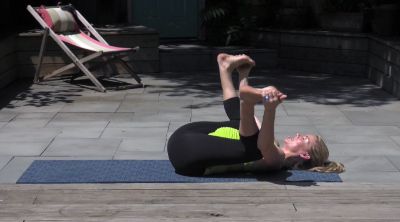

Release tension in the hips in Happy Baby pose (Ananda Balasana).
4. Hip Flow
Bend the knees and place both feet onto the mat next to each other. Place the hands next to the body with the palms facing the yoga mat.
On an inhale, lift the hips up. Exhale and lower the hips down. Inhale to lift the legs up, and on the exhale, rock forward to sit up and lift the upper body on the inhale. Roll back down onto the yoga mat as you exhale, and lift the hips up again. Flow through this little sequence a few times.

Practice this little hip flow at the end of a yoga class.
As you sit up the last time, cross the legs, lift the torso and stretch the arms up. Then, fold forward and let the entire upper body surrender over the legs. Let the forearms rest on the yoga mat and relax the head down. Take a few breaths in this position before rising back up.

Surrender into a cross-legged forward fold at the end of your yoga class.
Now, bring the hands behind the back with the fingertips pointing toward the buttocks. Press the hands into the ground and lift the hip up to stretch the front of the thighs. You can even carefully drop the head back if it feels good. Take a few breaths and return back into a seated position. Change the cross of the legs and walk the hands forward again to repeat this movement with the other leg on top. Notice the difference in both sides.
Use this restorative yoga pose to stretch the hip and the thighs.
5. Stretch Your Legs
Come up to sit into a straddle, i.e. stretching the legs out to the sides. Remove the fleshy part underneath the buttocks back to root down on the sitting bones.
Twist the upper body toward the right side and walk the hands forward to fold over the right leg. Take a deep breath here and then bring the right forearm on the inside of the right leg and open the left arm up overhead for a side stretch. Keep anchoring the left sitting bones down. Stay for a few breaths before you come out of the pose and turn to the left to repeat this stretch on the left side.
Come back to center and lift both arms up to expand through the rib cages. Shift the upper body forward and try to place the forearms onto the ground. Relax the head down, soften the shoulders and stay for a few breaths. If you want to deepen into this pose, you can take hold of the feet or big toes.


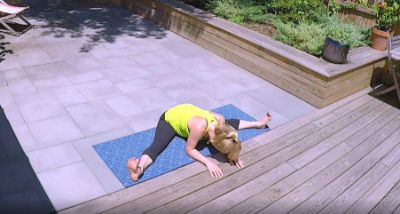
The end of a yoga class is a great time for wide-legged stretches.
Sit up again and fold the right leg in. Try to bring the ankle to the right side of the pubis and twist the trunk to the left side. Fold forward over your left leg. After a few breaths, switch sides and breathe here as well.
Come back up and bend both legs to bring the soles of the feet together. Let the knees fall outside. Bend forward over the legs again and stay for some breaths in this symmetrical forward fold.


Restorative yoga poses are perfect at the end of a yoga class.
Return to a comfortable seated position just like at the beginning of the class. Rest the hands on the knees and close the eyes for a moment. Establish the oceanic breath called ujjayi and tune into the body for a few breaths in this position.
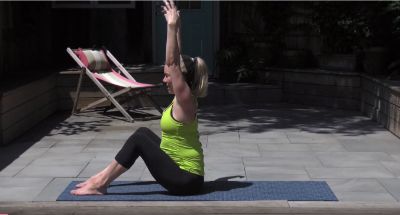
Close this restorative yoga sequence with another pranayama. For Bhastrika, reach the arms up above the head, bring the fingers to the palms and let the thumbs face each other. Start to introduce active chest inhalations and exhalations by forced, rapid, deep breathing.
As an alternative, you can also practice Kapalbhati, which involves a quick, short, forced exhalation using abdominal muscles followed by automatic passive inhalation.

End your yoga cool-down sequence with a few rounds of Bhastrika or Kapalbhati.
Both breathing exercises help to remove toxins from the body, strengthen and tone the abdominal region, and calm the mind.
After a few rounds of your preferred pranayama, take a deep inhale to fill the lungs up and hold the breath. Just when you can’t hold the breath any longer, exhale and let the arms circle down onto the knees.
To seal your restorative yoga practice, lie down onto the back for Savasana and stay at least five to ten minutes to allow your practice to settle in. In Savasana, the sensory stimulation and external distractions are finally minimized, allowing the body completely relax.

End the yoga class with Savasana.
5. Watch the Video: Restorative Flow with Kristin McGee
Watch the whole sequence on TINT if you want to roll out your mat and directly practice with Kristin McGee. While this easy 12-minute routine is a perfect yoga cool down for the end of your yoga class, you can use it any time a restorative yoga practice is needed. Enjoy the relaxation after that yoga sequence!