According to Psychology Today, approximately 80 to 90% of visits to the doctor are in some way related to stress, but hardly any doctors advise their patients on how to relieve stress or that you can use yoga for stress relief.
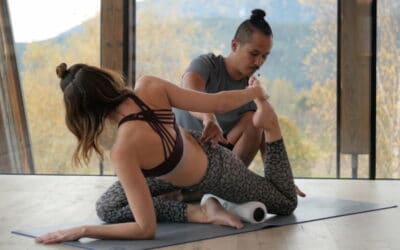
Although studies have shown that any form of exercise can lower the level of our stress hormone cortisol, yoga is probably the best way to relieve stress since it trains both body and mind by combining physical exercises with breathwork, mindfulness, and self-awareness. As a result, yoga practitioners are better able to cope with stress and can, thus, improve their overall health and well-being.
While all yoga styles – if practiced properly and safely – are beneficial for your health and can help to relieve stress and tension, it is in particular one type of yoga that has the most stress-relieving character: restorative Yin yoga poses.
Learn in this article how to use Yin yoga for stress relief:
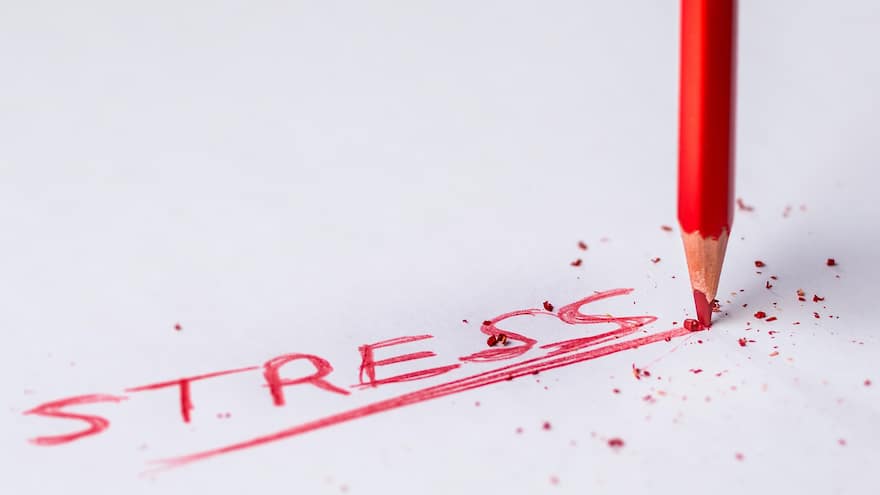
Stress is one of the most common reasons for visits to the doctor. Photograph by Pedro Figueras on Canva.
1. Definition of Yin Yoga
Yin yoga by definition is a very gentle yoga practice and is, therefore, a great way to release tension and relieve stress. Usually, only a few poses are practiced during one session and the poses are held for three to five minutes, up to even 20 minutes.
There is no muscular engagement throughout the whole practice. Only if the muscles are relaxed, it is possible to target the connective tissue.
Besides, there are usually no standing postures in a Yin yoga practice. Seated, supine or prone positions are best suitable to relieve stress and tension.
Probably the most important thing is to move slowly and be mindful throughout the yoga practice. Pay special attention to the breath while in the postures and tune into your body.
2. Relieve Stress With Mindful Breathing
Breathing exercises, called Pranayama in yoga, are a great addition to restorative Yin yoga poses for stress relief. This is because starting your stress-relieving yoga practice with mindful breathing helps to calm the mind and prepares the body for the Yin poses.
For the breathing exercises, you can either sit in a cross-legged position or on your heels. If sitting on the heels is uncomfortable, place a bolster between the heels and buttocks.
2.1. Observe your Breath
Place the hands onto the thighs either with the palms down or facing upward. Close the eyes to turn inward and observe your inner self. Take a deep breath in and as you breathe out, imagine you’re grounding yourself. On the next inhale, lengthen the spine from the tailbone up toward the head. On the exhale, drop the shoulders down away from the ears.
Visualize the eyeballs turning inward. Relax the tongue and the lips and soften the chest. Focus on the tip of the nose as you exhale. Enjoy every breath you take without any tension or any attempt to control the breath. Just observe it carefully and observe the heartbeat. Stay there for five to ten minutes.

Mindful exercises help to relieve stress. Photograph by Dardan on Unsplash.
2.2. Breathe into Your Ribcage
For the next mindful breathing exercise, place the hands onto the rib cage and keep the shoulders relaxed by dropping them down. Don’t arch the back and avoid letting the ribs pop out. Relax the lower spine and ground the sit bones.
Inhale and expand the rib cage out to the sides. Relax the collarbone and the chest area. On the exhale, feel the ribs sinking in again without pushing them inward. If you want, you can count to four on your inhale and to eight on the exhale. Stay focused and repeat this for about five breaths. Release the hands and return to the normal breathing pattern. Tune in to the body for a few breaths.
2.3. Get Ready for Your Yin Yoga Practice
Bring your awareness back and open the eyes again. Gently come into a table-top position, tuck the toes and circle the ankles to release tension from the ankle joints.
This is the perfect starting point for an asana practice. It doesn’t necessarily have to be a restorative Yin yoga practice – any form of asana practice performed with awareness can help you to release tension and relieve stress. If you need some inspiration for some example yoga sequences, check out our free Yoga Class Plans eBook, which contains different yoga class plans. It provides a detailed description of the relevant asanas in a logical order along with the most important alignment cues.
3. 9 Restorative Yin Yoga Poses for Stress Relief
If you’re now eager to try some restorative Yin yoga poses yourself but don’t know how to start, let Yin mindfulness yoga trainer Chris Su take you by the hand. In his 7-session Yin yoga program The Power of Deep and Mindful Relaxation on TINT he shares with you his knowledge about mindful breathing and mindfulness mediation, which will help you to develop an understanding about Yin yoga.
We also collected a series of 9 restorative Yin yoga poses which you can immediately put into practice now to unwind, calm down and release tension in various areas of the body. All you need to do is roll out your yoga mat and make sure you have props such as blankets, bolsters, and yoga blocks handy to support the body.
1. Release Tension with Cow Face Pose (Gomukhasana)
Sit in a cross-legged position and stretch both arms up into the air. Lower down the left hand to the side and rotate the arm so that the palm faces backward. Bend both elbows to clasp the hands behind the back. If it’s not possible to bring the hands together, use a strap and take hold of the strap with both hands.
Move the legs further away from the groin so that the legs are in a diamond shape. This will create a gentle stretch on the IT band and inner thigh. Slowly start to lean the upper body forward. Maybe it’s even possible to lower down all the way to rest the trunk onto the legs, but this is not a must. Just go as far as feels good in order to be able to stay in this pose for one or two minutes.
To come out of the pose, raise the upper body up and release the arms. Roll the shoulders a few times before repeating Cow Face pose (Gomukhasana) on the other side.

Practice Cow Face pose to release tension in the IT band with Yin yoga teacher Chris Su on TINT.
2. Eagle (Garudasana) Arms to Release Tension in the Shoulders
Stay in the cross-legged seat and relax the shoulder first before moving into the pose by rotating the shoulders a few times.
The target areas of this pose are the shoulder joints, the biceps, the neck, and upper back muscles and fascia. This is a very effective pose especially for those who spend a long time sitting in front of a computer.
Stretch the arms forward. Pay attention to not tighten the shoulders but rather open up the chest. Also, do not squeeze the shoulder up but let it drop down.
Bend the arms and cross the right arm on top of the left arm. Practitioners with really tight shoulders can place the hands on the shoulders. Those with more flexibility can bring the backs of the forearms together and maybe even the palms. Stay here for a while to arrive in the pose.
Slowly move the elbows forward without tightening up the shoulders. Try to keep the hands as far away from the face as possible. The further forward the hands, the more intense the stretch on the biceps muscle. Imagine you want to hug yourself.
To stretch the thoracic spine, round the back without leaning the body weight forward. Exercise this movement slowly and stay relaxed. Lower down the chin and drop the head down onto the chest. Move the elbows even further away from the body. Stay for three to four minutes and try to surrender even more into the pose.

Release tension in the shoulders by bringing the arms into an Eagle-pose shape.
To come out of the pose, slowly straighten the back again and release the hands. Place them next to the body with the fingertips on the floor.
Before repeating Eagle (Garudasana) on the other side, neutralize the neck by tilting the head left and right and gently dropping it back. Observe the sensations in the target area. Now, let the circulation return to the ankle area by placing the hands onto the ground in front to come into a table-top position and tuck the toes.
3. Criss-Cross Arms to Stretch the Shoulder
Lie down onto the belly (prone position). Open the feet as wide as the yoga mat. This is because, when the hip is squeezed together, the inner thighs (adductor group muscles) are engaged. If it feels uncomfortable to lie on the stomach, put a blanket under the belly.
Stretch both arms forward and try to create space in the shoulders instead of squeezing them together. Slide the right arm under the left shoulder and turn the right palm up to face the ceiling. Try to press the left shoulder down onto the yoga mat. To take this pose one step further, turn the head to face to the right side and also press the right shoulder down onto the yoga mat. If there’s discomfort in the neck area, place a bolster, pillow or blanket underneath the head.
If the right hand starts to get numb, there’s too much compression in the shoulder joint. In that case, place a blanket underneath the right shoulder.
As a next step, bend the left arm and place it between the shoulder blades with the palm facing up. Bend the right elbow as well to grab the left hand. The target areas of this pose are the shoulder joint, the lower neck, and the bicep muscle.
Grabbing the hands behind the back turns this pose into an intense stretch for the shoulders.
To come out of the pose, release the hands first. Bring the left arm to the front again and press it into the ground to lift the upper body up. Rest the forehand on the hands for a few breaths before repeating this pose with the arms crossed the other way around.
If you’re looking for more guidance on your yoga practice, we’ve created something special for you: a free eBook that contains yoga class plans ready to use for your classes. The eBook offers different classes for different levels, where you can find the asanas along with their descriptions in a logical order. You can either use the classes for your own yoga practice or your teaching.
4. Broken-Wing Angel Pose
Stay in a prone position and stretch the right arm out to the side with the palm facing down. Press the palm of the left arm into the floor next to the chest in a way that the left elbow points up. Bring the feet together. Bend the left leg and place the foot on the yoga mat.
Press the right shoulder into the floor and turn the body so that the chest lifts off the ground and the left shoulder moves toward the right. Try to lift the left knee up. Place a block or a bolster underneath the head to release tension from the neck.
As a next step, turn the palm of the right arm to face the ceiling and bring the left arm behind to clasp the hands together. Students who don’t have the flexibility in the shoulder joint to clasp the hands can use a strap and take hold of the strap instead.


Practice Broken-Wing Angel pose with or without a strap.
Squeeze the shoulder blades together with every exhale. Keep the chest and shoulders away from the ears. In this pose, the target area is the outer side of the bottom shoulder.
Stay in this pose for up to three minutes and rest in Crocodile with the forehead on the hands before repeating the pose the other side.

Rest in Crocodile pose between the poses.
5. Release Tension in the Groin in Butterfly Pose (Baddha Konasana)
Come into a seated position, bend the knees and place the feet in front of you. Open the knees out to the sides. Note that there’s a difference between the Yin version of this pose and the Yang version. In the Yang version, the feet are usually drawn toward the groin. In a restorative Yin yoga pose to release tension, however, it is recommended to move the feet further away from the body so that there’s have a diamond-shape space between the feet and the groin. This is because the closer the feet are drawn toward the body, the more muscle engagement there is in the thighs.
Relax the soles of the feet instead of pressing them together. This also helps to release tension in the groin area. Finally, try to bring the buttocks evenly onto the ground.
If there’s any discomfort in the groin or lower back area, place blocks underneath the knees for support. Place the hands on the inner sides of the thighs with the palms facing up. Facing the palms up externally rotates the shoulder and thus increases the space in the shoulder.
On an exhale, start to relax the thoracic spine. Pay attention to not hunch the back and to keep the shoulder relaxed. Slowly start to lean forward and drop the head down. Place one or two blocks underneath the forehead so that the head can rest without tightening the muscles in the shoulder area.
Stay for up to five minutes. Slowly lift the upper body to come out of the pose and bring the knees back together. Drop the head so that it can rest on the knees and stay in this pose for a while.

Use a Yin version of Butterfly pose to relieve stress.
6. Release Tension in Hip and Groin with Dragon Pose
Start in Child’s pose with the knees together and the arms extended in front. Lift the hips up to come into a table-top position and then into Downward-Facing Dog. Step the right foot in front on the outside of the right hand. Place the left knee on the floor.
In case of sensitive knees, place a blanket under the knee to protect it. Drop the back of the left foot onto the yoga mat and turn the toes of the right foot outward so that the foot is in a 45-degree angle. This will increase the space for the inner right thigh.
Straighten the arms, lift the chest and look forward. Stay here if this stretch is intense enough. To further deepen the stretch, place the forearms on the ground or on blocks and rest the head on the hands. The target areas of this pose are the inner thighs and the back muscles.
After one to two minutes in this pose, return to Downward-Facing Dog and rest in Child’s pose for a few breaths before repeating Dragon pose with the left foot in front.

Dragon pose is a great restorative Yin yoga pose for stress relief.
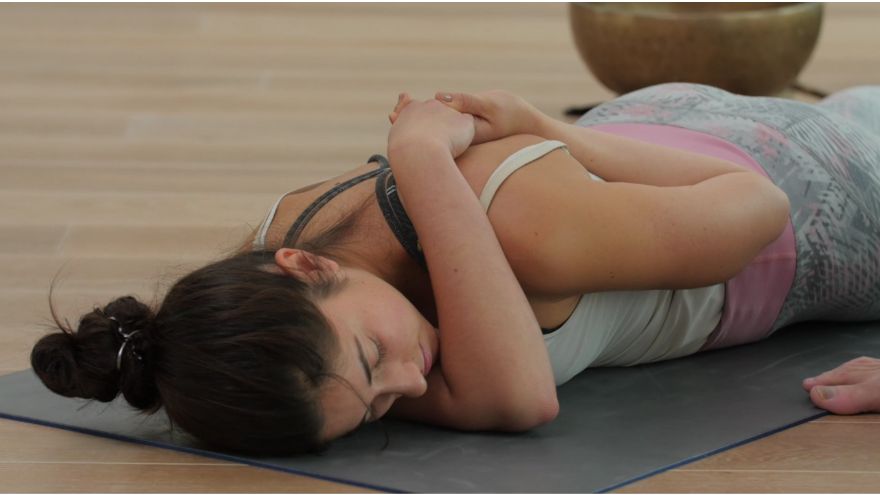
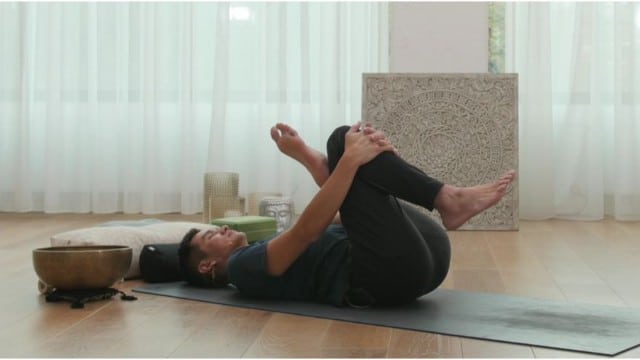
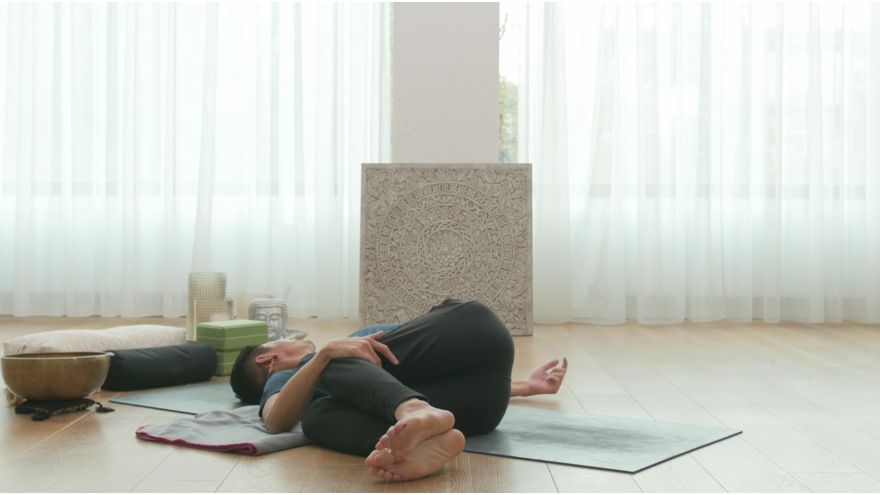
7. Supine Pigeon (Supta Kapotasana) Pose to Release Tension in the IT Band
Lie down on the back and hug the knees to the chest. Keep the shoulders relaxed and place the left ankle onto the right knee. Pull the right leg into the chest as close as possible. If the shoulders lift off the ground, use a strap to take hold of the right leg.
Hold this position for up to three minutes. The target area is the IT band and the outer hip area of the left leg. This pose also helps to improve blood circulation into the lower body.
When coming out of this pose, move the legs from side to side a few times to relax the muscles in the outer hip. Another option is to circle the knees a few times before placing the right ankle on top of the left knee to practice Supine Pigeon pose on the other side.

Practice Supine Pigeon pose with or without a strap.
8. Release the Entire Spine with Caterpillar Pose
This restorative Yin yoga pose is a more gentle version of the Seated Forward Bend (Paschimottanasana) practiced in more active yoga styles. It’s a great pose to recover the energy in between poses.
Come to a seated position and straighten both legs out in front. Keep the feet about hip-width apart and keep the toes relaxed without letting them fall outside. Practitioners who have difficulties stretching the legs completely can place a bolster underneath the knees. Ground the sit bones down, roll the shoulder back, and keep the chest lifted. On an exhalation, start to relax the middle back and lean forward.
In contrast to Paschimottanasana, where the focus is on lengthening and engaging the back muscles, the aim in Caterpillar is to relax the back by rounding it. Drop the head down to release any tension in the neck and rest the backs of the hands next to the legs. Place a block or a bolster between the legs to support the forehead if needed.
Stay for one to three minutes in Caterpillar pose. This pose has a lot of benefits: It stretches the back muscles and helps to release tension in the lower back and the neck. Apart from that, the rounding of the back shortens the front side of the body, massaging the abdominal organs. This is why Caterpillar is a great pose to relieve stress and recover the energy.
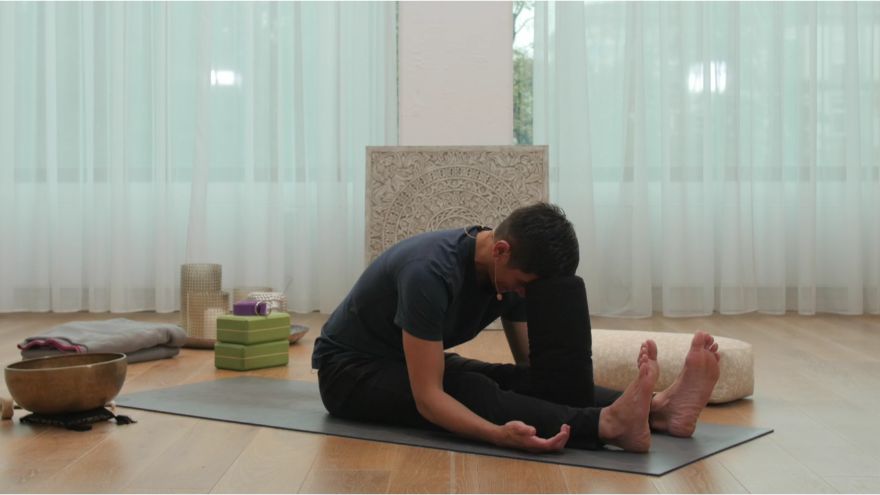
Release tension in the entire spine by practicing Caterpillar pose.
To come out of the pose, place the palms on the ground and walk them back toward your buttocks to slowly lift your trunk up until you sit upright again. Keep the hands on the ground next to the body.
9. Snail Pose
This pose is not suitable for practitioners with tight shoulders, spine injury, high or low blood pressure, asthma or other respiratory issues.
Snail pose is intended to increase the flexibility of the entire spine. It can also improve the blood circulation in the upper body fascia line. Apart from that, the strong rounding of the spine compresses the abdominal organs and can thus improve digestive functions.
Before coming into the pose, place a bolster or yoga block at the top of the yoga mat behind the back. Roll out a blanket underneath the body to protect your spine.
Lie down onto the back and bend the knees. Place the hands next to the body. Lift the legs by engaging the abdominal muscles. Suck in the belly and lift up the hips. Straighten the legs and place the toes behind the head either on top of the block or bolster or onto the ground.


Use a bolster for Snail pose, if you want.
This pose looks similar to Halasana in Yang yoga styles, but the difference is that the spine stays rounded instead of being straightened as it is the case in a Yang yoga practice. Do not squeeze the shoulders in by placing the elbows close to each other. Instead, straighten the arms wide to the side with the palms facing up. Either bend the knees here or keep the legs straight.
Pay attention in Snail pose to not turning the neck in this pose. Maintain the space between the chin and the chest. There is quite a lot of compression on the neck and the shoulders. This is why Snail pose provides a quite intense stretch for the neck and the lower back. Ideally, stay in this pose for three to five minutes.
To come out of the pose, press the palms into the ground and engage the core muscles to slowly roll down vertebra by vertebra. Hug the knees into the chest and slowly turn the head left and right. Then, lift up the head and bring the forehead to the knees a few times.

Bring the forehead to the knees to neutralize the spine.
4. Seal Your Restorative Yin Yoga Practice
After having practiced these 9 restorative Yin yoga poses, come into a supine spinal twist as a recovery pose to neutralize the spine. Keep the knees hugged in and let them fall to the right side while turning the head to the left side. Stretch the arms out to the sides.
Use the right hand to gently guide the knees toward the ground. Stay in this pose for a few breaths and then change sides, i.e. drop the knees to the left and turn the head to the right.
Neutralize the spine in a Supine Spinal Twist.
Return to center after a few breaths and seal the yoga practice with Savasana. Practicing these poses regularly can help to find inner peace, release tension and relieve stress.
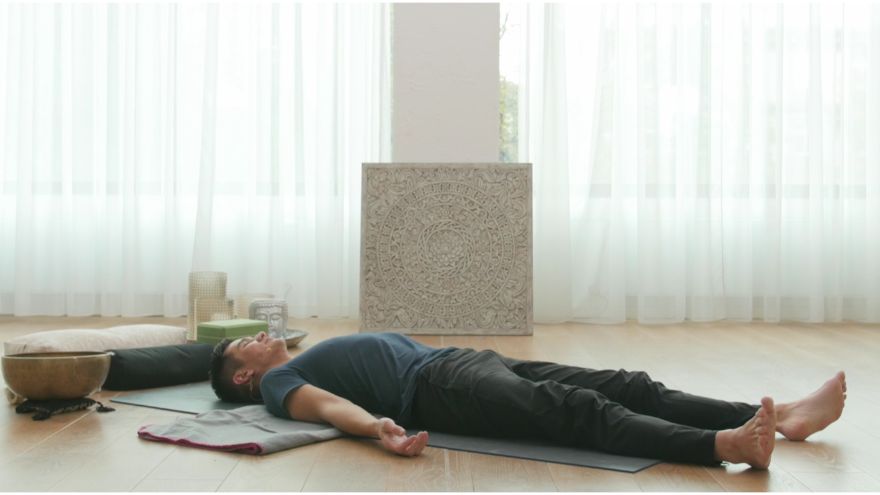
End your stress-relieving yoga practice in Savasana.
5. Watch the Video: Yin Yoga for Stress Relief with Chris Su
That sounds so good that you want to unwind with a mindful Yin yoga practice straight away? You may like Chris Su’s 30-minute Yin yoga class for stress relief on TINT. This practice will help you to calm your mind while at the same time increasing the flexibility and mobility of your joints and connective tissue. Every pose is held at least 3 to 5 five minutes, which gives you time and space for meditation and for cultivating strength.
Try Yin Yoga for Stress Relief with Chris Su on TINT.
Having completed a Yin yoga sequence, your mind is calm and you’re more mindful aware of yourself. This is the perfect starting point for more awareness and mindfulness. You can follow this Yin yoga sequence up with a yoga meditation practice.
Get some guidance on how to get started with a regular meditation practice from yoga teacher Matt Giordano in his 30-Day Yoga and Meditation Challenge, which is designed to help you find a greater sense of well being in both body and mind.
If you’re looking for more tools to make your yoga practice or yoga teaching easier, have a look at our free collection of Yoga Class Plans, which provides free sample yoga class plans for various different class types and levels. Each class contains a sequence of asanas along with their description and is a great tool if preparation time is short and you just want to roll out your mat or start teaching.